Thanks for stopping by my blog! I am hoping this can be a space where I can share my work and inspirations, as well as receive feedback from fellow potters. Here's what I have been up to this week.
I have been working on a new style of vase that I have wanted to attempt for a while now. The idea came to me, while looking at images of Islamic doorways and arches, which I usually draw some inspiration from. Like this one for example...
I have been working on a new style of vase that I have wanted to attempt for a while now. The idea came to me, while looking at images of Islamic doorways and arches, which I usually draw some inspiration from. Like this one for example...

How beautiful is that?! I would love to visit the Middle East some day and see some of this gorgeous architecture.
Anyway, I have a bit of an obsession with flowers, so naturally I try to make something that has to do with them whenever I can. The challenge I gave myself was to create a vase that referenced those beautiful archways. I typically build vertically so this project was a bit of a challenge for me, but it was definitely a good learning experience!
I made each portion of the vase separately on the wheel, and then assembled them together into the horizontal vase. This is how it looks with all of the separate parts assembled.
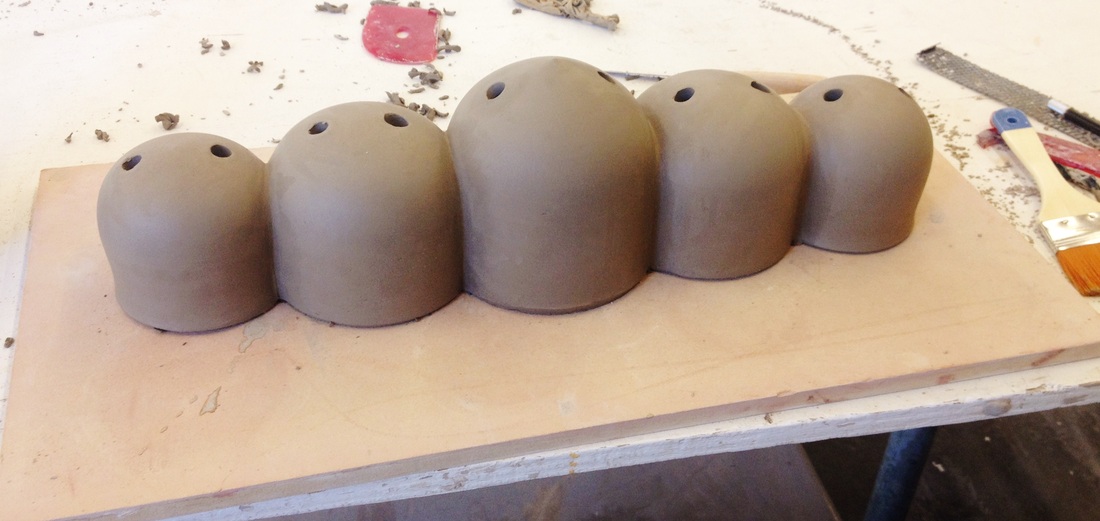
So just imagine that each of the 5 parts was thrown by itself, hollow, and then attached together into one single piece with one continuous water chamber throughout. Apparently vases like this are called "flower bricks", which I have never heard of before but now I am in love! Especially the ones made by the artist Joan Bruneau. Her flower bricks can be seen here. Trust me, they are to die for!
The next step in my process was to add some surface decoration. I recently got my hands on a slip trailer like this one which I bought on amazon and I love it. In the past, I created a lot of my surface design in the glaze stage using wax resist and different glazes, but I am really loving the 3D design you can achieve with slip trailing! My designs typically reference mandalas or henna designs. I just love the delicate, repetative look it creates.
The next step in my process was to add some surface decoration. I recently got my hands on a slip trailer like this one which I bought on amazon and I love it. In the past, I created a lot of my surface design in the glaze stage using wax resist and different glazes, but I am really loving the 3D design you can achieve with slip trailing! My designs typically reference mandalas or henna designs. I just love the delicate, repetative look it creates.
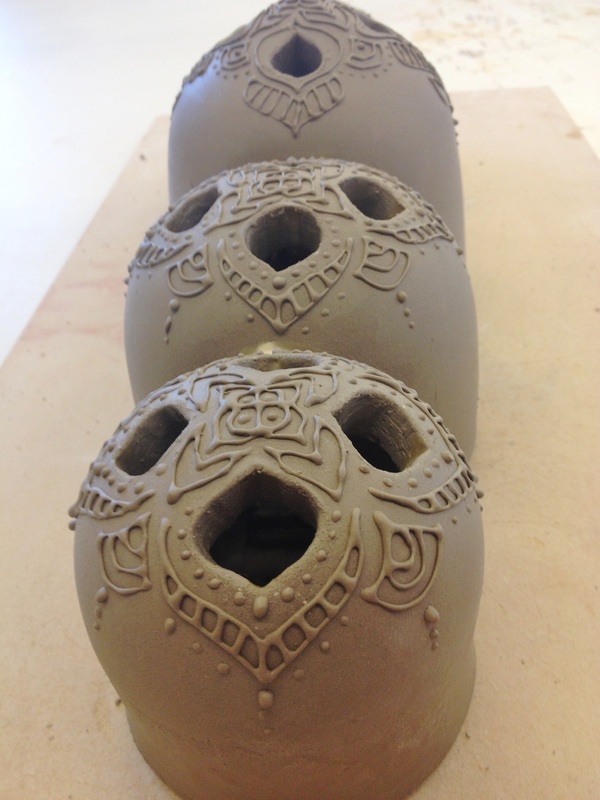
This is the finished product. I cut holes in the piece which is where the flowers stems will be poked into the pot. And I have to say, I'm not too thrilled at the way they turned out. I wanted them to be incorporated into the slip trailing design, but it was hard to cut out the shapes I was going for with just an X acto knife. Does anyone have any suggestions of how I can get cleaner cut out shapes when I make more of these in the future? Please comment below if you do! I would love your feedback.
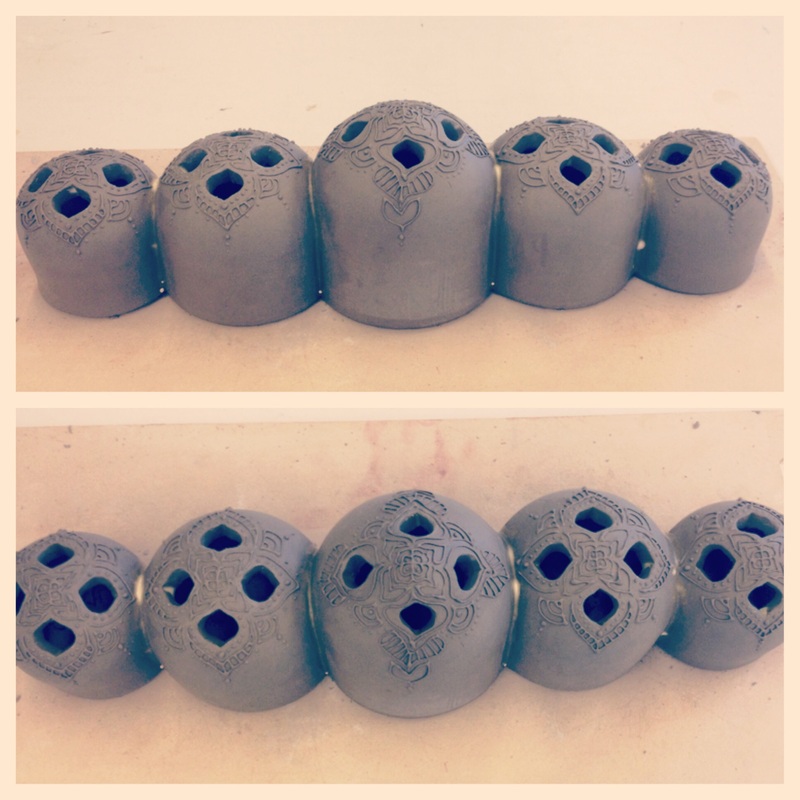
This is the finished product! I am sad to say, it got a hairline crack between one of the connection points in the bisque firing. Such a bummer! I glazed it anyways, for a class critique this week. Lets hope it pulls through the glaze fire and is able to hold water!
If anyone has any feedback on what I can do better next time, please let me know! I am thinking of creating a press mold next time to I can crank out a bunch and not have to deal with attachments. Thanks for reading!
If anyone has any feedback on what I can do better next time, please let me know! I am thinking of creating a press mold next time to I can crank out a bunch and not have to deal with attachments. Thanks for reading!

 RSS Feed
